- Published on
TodoMVC with HTMX and Hyperscript - Part 1
11 min read
- Authors
-
-

- Name
- Ryan Dsouza
- @ryands1701/
- Senior Software Engineer (Golang, AWS) at ABN AMRO
-
Introduction
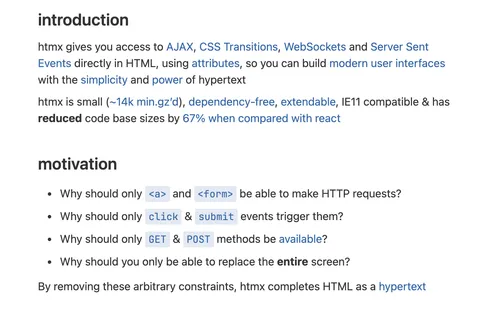
I’ve recently started dabbling with HTMX and Hyperscript and I’m really in awe of its ease of use. You can think of HTMX as a Server Rendered app where you send just HTML back to the browser where HTMX handles that using API calls. It can be best described as shown on the HTMX page:
Why HTMX
What we generally follow when creating webapps is as follows:
- Create an API
- Call the API via
fetchor any query management tool - Send data in the form of JSON
- Construct HTML with that JSON
HTMX simplifies the step by removing the JSON part which would look like this:
- Create an API
- Use HTMX attributes to call API’s directly (via AJAX)
- Send the updated HTML directly
Creating a Todo app
For those who want to follow along, you can clone and run this repo locally. The CSS has been taken directly from a sample TODOMVC app and is in the public folder.
Listing todos
Let’s start by creating an array that holds a list of todos. We will be keeping the todos in-memory for now and in a later post, we’ll look at connecting this to a database like DynamoDB.
import { z } from 'zod';
import { v4 as uuidv4 } from 'uuid';

export const TodoSchema = z.object({
  id: z.string().uuid().default(uuidv4()),
  text: z.string().min(1, 'Content is required!'),
  completed: z.boolean().default(false),
});

export type Todo = z.infer<typeof TodoSchema>;

const db: schemas.Todo[] = [
  { id: uuidv4(), text: 'Learn HTMX', completed: false },
  { id: uuidv4(), text: 'Learn Vim', completed: true },
];
Here we are using Zod to create a Todo schema so that we have compile-time and runtime validation. We require three fields:
id: A string but automatically is defaulted to a UUIDtext: Also a string but it shouldn’t be empty and Zod here handles the validationcompleted: A boolean value and defaulted tofalseas newly created todos will always be marked as “Not Done”
I have added a couple of Todos to my liking to be displayed once we start our server. Let’s also create an HTML Layout that will be sent on page load.
Personally, I love components and JSX is simply amazing! It helps us write components in a type-safe manner instead of using a template like EJS or Handlebars. We will be using KitaJS HTML which helps us write JSX without React and renders as a string which we can directly send back to the client. How cool is that 😃
Here’s the Base HTML component that we will be sending:
export function BaseHtml({ children }: html.PropsWithChildren) {
  return `<!DOCTYPE html>
  <html lang="en">
  <head>
    <meta charset="UTF-8">
    <meta name="viewport" content="width=device-width, initial-scale=1.0">
    <title>Express + HTMX</title>
    <link rel="stylesheet" href="/static/index.css" />
    <script src="/static/[email protected]"></script>
    <script src="/static/[email protected]"></script>
  </head>
  ${children}
  <script>
    htmx.config.globalViewTransitions = true;
    htmx.config.useTemplateFragments = true;
  </script>
  </html>
`;
}
This is a basic template where we import HTMX, Hyperscript, and some CSS. We will be passing in some HTML as part of the children prop here like the list of todos from our db variable. Our base HTML in our main endpoint will look like this:
app.get('/', (req, res) => {
  const FilterTodosSchema = z.object({
    filter: z
      .enum(['all', 'active', 'completed'])
      .optional()
      .transform((val) => (val ? val : 'all')),
  });

  const { filter } = FilterTodosSchema.parse(req.query);

  const main = (
    <BaseHtml>
      <body>
        <div>
          <section class="todoapp">
            <header class="header">
              <h1>todos + HTMX</h1>
              <input
                class="new-todo"
                name="text"
                placeholder="What needs to be done?"
                autofocus="true"
              />
            </header>
            <footer class="footer">
              <span class="todo-count" />
              <ul class="filters">
                <li>
                  <a href="/" class={clsx({ selected: filter === 'all' })}>
                    All
                  </a>
                </li>
                <li>
                  <a
                    href="/?filter=active"
                    class={clsx({ selected: filter === 'active' })}
                  >
                    Active
                  </a>
                </li>
                <li>
                  <a
                    href="/?filter=completed"
                    class={clsx({ selected: filter === 'completed' })}
                  >
                    Completed
                  </a>
                </li>
              </ul>
              <button class="clear-completed">Clear completed</button>
            </footer>
          </section>
          <footer class="info">
            <p>Double-click to edit a todo</p>
            <p>
              Created by <a href="http://github.com/ryands17/">ryandsouza</a>
            </p>
            <p>
              Part of <a href="http://todomvc.com">TodoMVC</a>
            </p>
          </footer>
        </div>
      </body>
    </BaseHtml>
  );

  res.send(main);
});
The above is a basic skeleton in which we will be adding HTMX directives to to perform CRUD operations on our todos. We send this via res.send from Express.
Now let’s create an API that will be consumed by HTMX to return this list:
export const FilterTodosSchema = z.object({
  filter: z
    .enum(['all', 'active', 'completed'])
    .optional()
    .transform((filter) => (filter ? filter : 'all')),
});

app.get('/todos', (req, res) => {
  const { filter } = FilterTodosSchema.parse(req.query);

  switch (filter) {
    case 'all':
      return res.send(
        <>
          <TodoList todos={db} />
          <TodoCount count={remainingTodoCount} />
        </>,
      );
    case 'active': {
      const todos = db.filter((todo) => !todo.completed);
      return res.send(
        <>
          <TodoList todos={todos} />
          <TodoCount count={remainingTodoCount} />
        </>,
      );
    }
    case 'completed': {
      const todos = db.filter((todo) => todo.completed);
      return res.send(
        <>
          <TodoList todos={todos} />
          <TodoCount count={remainingTodoCount} />
        </>,
      );
    }
  }
});
Here we create a /todos endpoint that accepts a filter in the form of active, completed, or all. We use Zod here so that if a filter isn’t passed, we default to all. The logic is a simple switch case where we just filter the todos based on the completed boolean. There’s also a <TodoList /> component that we return here. This is the power of HTMX, we can just return HTML that will be displayed where we want it to 😃
import { clsx } from 'clsx';

export function TodoList({ todos }: { todos: Todo[] }) {
  const allTodosDone = todos.every((todo) => todo.completed);

  return (
    <section class="main">
      <input
        id="toggle-all"
        name="allTodosDone"
        class="toggle-all"
        type="checkbox"
        checked={allTodosDone}
      />
      <label for="toggle-all" />
      <ul class="todo-list">
        {todos.map((todo) => (
          <TodoItem todo={todo} />
        ))}
      </ul>
    </section>
  );
}

export function TodoItem({ todo }: { todo: Todo }) {
  return (
    <li
      class={clsx({
        completed: todo.completed,
        editing: false,
      })}
    >
      <div class="view">
        <input class="toggle" type="checkbox" checked={todo.completed} />
        <label safe>{todo.text}</label>
        <button class="destroy" />
      </div>
      <input class="edit" name="todoText" value={todo.text} />
    </li>
  );
}

export function TodoCount({ count }: { count: number }) {
  const todoText = count === 1 ? 'todo' : 'todos';

  return (
    <span>
      <strong>{count}</strong> {todoText} left
    </span>
  );
}
In the above snippet, we create have three components:
- A
TodoListcomponent that accepts a list of todos as props coming from our/todosAPI - A
TodoItemcomponent that will render each individual todo with some classes applied. We are usingclsxhere for easy readability and simplicity of adding multiple classes - A
TodoCountcomponent that displays the count of remaining todos
Let’s modify the / endpoint to sprinkle in some HTMX directives and fetch our todos with the count in the footer:
app.get('/', (req, res) => {
  export const FilterTodosSchema = z.object({
    filter: z
      .enum(['all', 'active', 'completed'])
      .optional()
      .transform((filter) => (filter ? filter : 'all')),
  });

  const { filter } = FilterTodosSchema.parse(req.query);

  const main = (
    <BaseHtml>
      <body
        hx-get={`/todos?filter=${filter}`}
        hx-trigger="load"
        hx-target=".header"
        hx-swap="afterend"
      >
        ...rest of the HTML/JSX
      </body>
    </BaseHtml>
  );

  res.send(main);
});
Here, we add some hx directives that and here’s what they do:
hx-get: This makes a GET request to our Express API we defined above and passes the filter from the URLhx-trigger: We set the trigger toloadwhich means this API will automatically be called on page loadhx-target: Where do we want to put the returned HTML. This is in an element with the class namedheader. You can use CSS selectors as I have herehx-swap: Where exactly should the element be put in the target.afterendmeans that this will be appended after the.headerelement i.e. as a sibling. Here is a list of options forhx-swap
The todo list is displayed correctly, but we can see that the count isn’t:
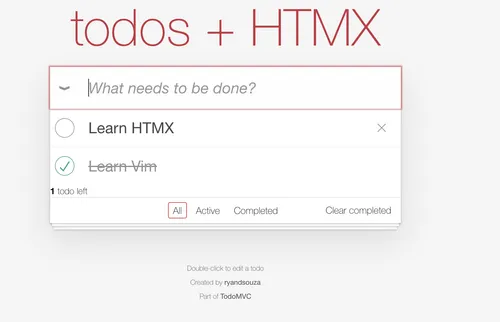
To fix this, we need to perform an Out Of Band (OOB) update. Which means that we need to tell HTMX that apply this HTML to another place in the markup. The way we do this is by adding the hx-swap-oob attribute as follows:
export function TodoCount({ count }: { count: number }) {
  const todoText = count === 1 ? 'todo' : 'todos';

  return (
    <span hx-swap-oob="innerHTML:#todo-count">
      <strong>{count}</strong> {todoText} left
    </span>
  );
}
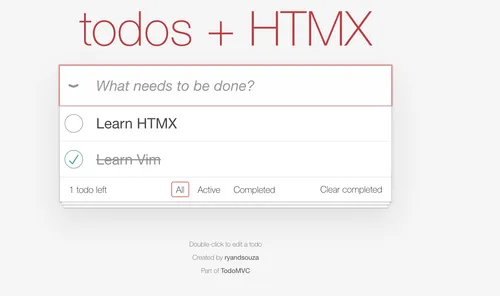
This will tell HTMX to replace this component in the innerHTML of the element that has the ID todo-count. Now we can see that the todos are displayed correctly 🎉
Adding a todo
Let’s now add a todo. We already have this input in our body:
<input
  class="new-todo"
  name="text"
  placeholder="What needs to be done?"
  autofocus="true"
/>
Let’s spice this up with a todo creation endpoint and some HTMX directives.
We need a POST request this time to create a new todo as we will be passing the input text to the endpoint:
const TodoSchema = z.object({
  id: z.string().uuid().default(uuidv4()),
  text: z.string().min(1, 'Content is required!'),
  completed: z.boolean().default(false),
});

app.post('/todo', (req, res) => {
  const todo = TodoSchema.parse(req.body);
  db.push(todo);

  res.send(<TodoItem todo={todo} />);
});
What we do here is parse the request body with Zod and return a new <TodoItem/> with the newly created todo. We will use some HTMX directives on the input making sure that this new todo is appended to the correct place like this:
<input
  class="new-todo"
  name="text"
  placeholder="What needs to be done?"
  autofocus="true"
  hx-post="/todo"
  hx-trigger="keyup[keyCode==13]"
  hx-target=".todo-list"
  hx-swap="beforeend"
/>
Here’s what each of these directives do:
hx-post: Send a POST request to the/todoendpoint and pass the value from theinputfield. How does HTMX know what should the name of the field be? Simple! It looks at thenameattribute on theinputelement and automatically sends to the endpoint along with the valuehx-trigger: This is a special one. We want to submit when the user presses the Enter key. HTMX uses the browser nativekeyupevent and we specify that only trigger the API when the key code matches the Enter key, which is 13 in this casehx-target: We want to add this to the.todo-listsection so we specify that herehx-swap: We want to append this new todo at the end of the list, so we usebeforeendhere
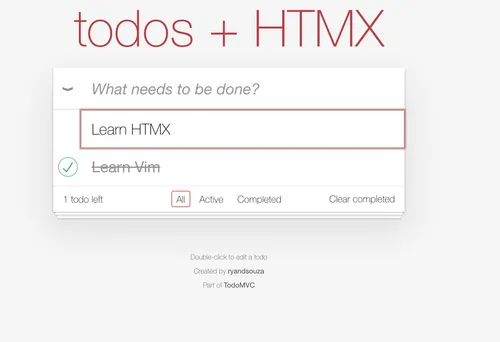
Once, this is implemented, you’ll see the new todo added! This looks so simple and clean! But notice that we have a minor problem:
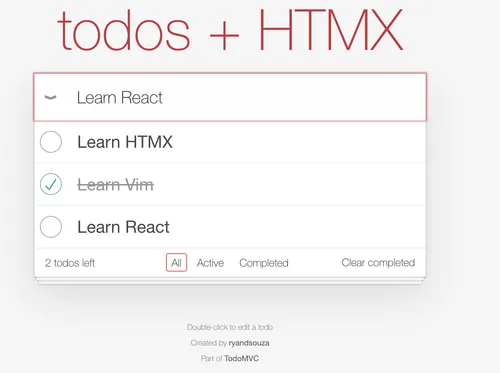
The text in the input is not cleared after the new todo is created. Here’s where Hyperscript comes into the picture. Let’s see how HTMX and Hyperscript provide us with a simple solution to this:
To clear the input field, we can use Hyperscript which we added as a script in our base HTML. Hyperscript provides a special HTML attribute as an underscore where we can add some human-readable client side logic without writing JavaScript. Let’s see how we can clear the input field after a new todo is added:
<input
  class="new-todo"
  name="text"
  placeholder="What needs to be done?"
  autofocus="true"
  hx-post="/todo"
  hx-trigger="keyup[keyCode==13]"
  hx-target=".todo-list"
  hx-swap="beforeend"
  _="on htmx:afterOnLoad set target.value to ''"
/>
The final _ attribute is just what we need! This reads as: “Set the current element’s value to an empty string after the htmx:afterOnLoad event i.e. after the the new response has been added”. HTMX provides us with a custom set of events and we can directly reference them in our client side code. Hyperscript makes us write readable client side logic for which we would have to write JavaScript in a separate script tag. This is what’s so cool about combining HTMX and Hyperscript. You never need to write your own custom JavaScript for operations like these 🙂
Deleting a todo
Deleting a todo is also easy. We have the x button here that we use to delete a todo:
Again, we need to use HTMX attributes on the delete button to remove that todo:
<button
  class="destroy"
  hx-post={`/todos/${todo.id}`}
  hx-target="closest li"
  hx-swap="outerHTML"
/>
Let’s see what the HTMX attributes mean:
hx-post: Perform a POST request on the/todos/:idendpointhx-target: Match the closest<li />tag, which is the entire todohx-swap: UseouterHTMLto replace the entire<li />tag
And here’s the corresponding endpoint:
app.post(`/todos/:id`, (req, res) => {
  const TodoOperationParamsSchema = z.object({ id: z.string() });
  const params = TodoOperationParamsSchema.parse(req.params);

  const todoIndex = db.findIndex((val) => val.id === params.id);
  if (todoIndex !== -1) {
    db.splice(todoIndex, 1);
  }
  const remainingTodoCount = fetchRemainingTodoCount();

  res.send(<TodoCount count={remainingTodoCount} />);
});
What we do above is return nothing for the closest <li /> tag so that it is deleted and just return the <TodoCount /> with the updated footer count of remaining todos. This makes sure that our todo is deleted and the count in the footer is updated correctly.
Toggling a todo
This is similar to adding a todo but instead of a text field, we have a checkbox. Repeating, let’s add some HTMX attributes:
<input
  class="toggle"
  type="checkbox"
  checked={todo.completed}
  hx-post={`/todos/toggle/${todo.id}`}
  hx-target="closest li"
  hx-swap="outerHTML"
/>
Here’s how it works:
hx-post: Perform a POST request to the/todos/toggle/:idpassing in the ID of the todohx-target: Again, let’s select the closest<li />which contains the entire todohx-swap: UseouterHTMLagain to replace the entire todo
The corresponding endpoint would look like:
app.post('/todos/toggle/:id', (req, res) => {
  const TodoOperationParamsSchema = z.object({ id: z.string() });
  const todo = db.find((val) => val.id === params.id);

  if (todo) {
    todo.completed = !todo.completed;
    const remainingTodoCount = fetchRemainingTodoCount();

    res.send(
      <>
        <TodoItem todo={todo} />
        <TodoCount count={remainingTodoCount} />
      </>,
    );
  }
});
In the above snippet, we find the todo by ID and if it exists, we toggle the completed property and return the updated <TodoItem /> and <TodoCount>.
This is how it would look like with the checked item and updated count in the footer:

Updating a todo
This is something that requires client side JavaScript so that we can perform operations like:
- Double clicking a todo text replaces it with an input element with the todo text to update
- Pressing the Enter key updates the todo text
- Pressing the Escape key aborts the editing
We will again write use Hyperscript to perform the above operations easily and submit the updated todo text using HTMX. This is how the toggle would look like in the <TodoItem /> component:
export function TodoItem({ todo }: { todo: Todo }) {
  return (
    <li
      class={clsx({
        completed: todo.completed,
        editing: false,
      })}
    >
      <div class="view">
        <input
          class="toggle"
          type="checkbox"
          checked={todo.completed}
          hx-post={`/todos/toggle/${todo.id}`}
          hx-target="closest li"
          hx-swap="outerHTML"
        />
        <label safe _="on dblclick add .editing to the closest parent <li/>">
          {todo.text}
        </label>
        <button
          class="destroy"
          hx-post={`/todos/${todo.id}`}
          hx-target="closest li"
          hx-swap="outerHTML"
        />
      </div>
      <input
        class="edit"
        name="todoText"
        value={todo.text}
        _="on keyup[key is 'Escape'] remove .editing from the closest parent <li/>"
        hx-put={`/todos/${todo.id}`}
        hx-trigger="keyup[keyCode==13]"
        hx-target="closest li"
        hx-swap="outerHTML"
      />
    </li>
  );
}
Let’s break the Hyperscript attributes down first:
The _ attribute on the <label /> element says that on the native double-click event, add a class named editing to the parent <li /> tag. This makes sure that editing is turned on and we see an input box with out todo filled out like this:
Then on the <input /> field with the name attribute set to todoText, we add another Hyperscript _ attribute which says that if the Escape key is pressed, remove the editing class from the parent <li /> and return it back to the normal state. See how easy to read this is compared to writing custom JavaScript 😃
On the same <input /> element, we add HTMX attributes to update the todo. Here’s what they do:
hx-put: Perform a PUT request on/todos/:idpassing in the ID of the todohx-trigger: This endpoint should only be called when the Enter key is pressed (key code 13)hx-target: Update the closest<li />which is the<TodoItem />componenthx-swap: Use outerHTML to update the entire todo
The endpoint for the above will look like this:
app.put('/todos/:id', (req, res) => {
  const EditTodoSchema = z.object({
    todoText: z.string().trim(),
  });
  const TodoOperationParamsSchema = z.object({ id: z.string() });

  const { todoText } = EditTodoSchema.parse(req.body);
  const params = TodoOperationParamsSchema.parse(req.params);

  const todo = db.find((val) => val.id === params.id);
  if (todo) {
    todo.text = todoText;
    res.send(<TodoItem todo={todo} />);
  }
});
In the above snippet, we get the ID of the todo from the params and HTMX automatically sends the edited text in the todoText field as that was the name of our <input /> element. We then update the todo text and send the <TodoItem /> with the updated todo. Notice here we don’t need to update the footer count as we’re not toggling the completion status on the todo. HTMX makes things simple to think and implement.
Conclusion
Yay! We completed CRUD for our Todo app 🎉
Thinking in HTMX requires a paradigm shift from frameworks like React, Vue and it’s fun when you can directly return HTML back to the browser (the OG SSR way) by not sacrificing the benefits of JSX! HTMX directives mixed with a pinch of custom JS via Hyperscript makes web dev fun again! Here’s the repo again for the above code: HTMX TodoMVC.
I hope you liked the post, follow me on Twitter: @ryands17 for where I will continue posting about this series. The next part will include a persistent database like DynamoDB so that the todos aren’t lost on server restart. Happy HTMXing 😃