- Published on
TodoMVC with HTMX and Hyperscript - Part 2
7 min read
- Authors
-
-

- Name
- Ryan Dsouza
- @ryands1701/
- Senior Software Engineer at Shell Recharge Solutions
-
Introduction
This is Part 2 of the Node and HTMX series. If you haven’t read the previous one, do give it a read here: TodoMVC with HTMX and Hyperscript - Part 1.
In this post, we’ll look at how to deploy the previously created Todo app with HTMX on AWS using SST. SST is a tool that allows us to easily deploy full stack apps on the cloud, in this case AWS.
Prerequisites
Before continuing further, we would need this:
- An AWS account
- aws-cli installed
- AWS credentials configured to allow SST to deploy locally. You can use the Administrator role here as this is only for personal development.
Note: Please do not share these credentials with anyone. If uncertain, delete them after you’re done using them.
The respository for the code is here, so you can play around and deploy this locally: https://github.com/ryands17/htmx-todomvc.
The architecture
We will be deploying our Express app which is NodeJS on a Lambda function. The static assets, like CSS and JS scripts (HTMX and Hyperscript) will be stored on S3. These will be linked via CloudFront which acts as a CDN for both our Lambda and S3. Lambda functions expose a URL that will be used by CloudFront to serve our shiny todo app 😃
Setting up SST
We need to install three packages here:
sst: The main package for our Lambda, S3, CloudFront constructsaws-cdk-lib: As SST uses CDK under the hood, we need thisconstructs: Also a dependency of CDKserverless-http: This is used to create a Lambda compatible HTTP handler for our Express API
Writing the constructs
Let’s move on to writing the constructs. All these constructs are in the src/SSrStack.ts file.
The Lambda function
Let’s start with the Lambda function. Our entrypoint for the lambda is the src/app.ts file which exposes a variabled called handler. This will be used in the lambda construct.
import * as sst from 'sst/constructs';

const name = 'todoMvc';
const todoApp = new sst.Function(stack, name, {
  handler: 'src/app.handler',
  url: true,
});
In the above snippet, we create a Lambda function with the sst.Function construct and pass in the name of the resource ID and the handler. We also set the url property to true because we want Lambda to give us the URL with which we can invoke this function. Let’s now create the S3 bucket to store static assets.
The S3 bucket
We require two resources here:
- To create a bucket to store our static files
- To upload our static files to the bucket
For this, we need a couple of imports from aws-cdk-lib:
import * as s3 from 'aws-cdk-lib/aws-s3';
import { RemovalPolicy } from 'aws-cdk-lib/core';
import { BucketDeployment, Source } from 'aws-cdk-lib/aws-s3-deployment';

const assetsBucket = new s3.Bucket(stack, 'assetsBucket', {
  publicReadAccess: false,
  autoDeleteObjects: true,
  removalPolicy: RemovalPolicy.DESTROY,
});

new BucketDeployment(stack, 'deployAssets', {
  sources: [Source.asset('./public')],
  destinationBucket: assetsBucket,
  destinationKeyPrefix: 'static',
});
First, we define a bucket for our assets where we disallow public read access. This is because the bucket will only be referenced by CloudFront and we don’t want anyone to be able to access it. We then create a BucketDeployment construct to deploy our static files to the bucket. We pass in the path where our public files will be i.e. the public folder in the respository and also pass in a destinationKeyPrefix which will be used to prefix the files in the bucket with the /static path so CloudFront can reference them directly.
The CloudFront distribution
We come to the main part of the stack. CloudFront will act as a CDN here for our static files in S3 and also serve the Lambda function with the URL. CloudFront differentiates reqeusts with something known as behaviours. We need two behaviours here:
- One that serves our Lambda function with the Todo app and API. This is the
defaultbehaviour - One that serves our static assets. This is the S3 bucket and the path this behaviour will act on is
/static
Setting up CloudFront for the Lambda
Let’s start with the default behaviour:
import * as cloudfront from 'aws-cdk-lib/aws-cloudfront';
import { Fn } from 'aws-cdk-lib/core';

const splitFunctionUrl = Fn.select(2, Fn.split('/', todoApp.url!));

const staticDistribution = new cloudfront.Distribution(stack, 'cdn', {
  comment: 'Serve the public folder for the SSR app',
  httpVersion: cloudfront.HttpVersion.HTTP2,
  defaultBehavior: {
    origin: new HttpOrigin(splitFunctionUrl, {
      originId: 'httpServer',
    }),
    compress: true,
    cachePolicy: cloudfront.CachePolicy.CACHING_DISABLED,
    originRequestPolicy: new cloudfront.OriginRequestPolicy(
      stack,
      'passHeaders',
      {
        queryStringBehavior: cloudfront.OriginRequestQueryStringBehavior.all(),
      },
    ),
    allowedMethods: cloudfront.AllowedMethods.ALLOW_ALL,
    viewerProtocolPolicy: cloudfront.ViewerProtocolPolicy.REDIRECT_TO_HTTPS,
  },
});
Let’s break this down. First, we fetch the Lambda URL and split it so that we can get the URL without the https:// as CloudFront doesn’t allow those. We then create the distribution with the cloudfront.Distribution construct and add a default behaviour.
This behaviour is an HTTP origin which points to the Lambda function URL. We ask CloudFront to compress the responses and disable caching as we don’t want requests from the API to be cached for our use case. We then create an OriginRequestPolicy that will allow all query strings from our request to be passed directly to the Lambda function.
Finally, we set the viewerProtocolPolicy to make sure we always serve on https and allow all methods (e.g. GET, POST, etc) to be called for our Lambda URL. Let’s setup another CloudFront behaviour for the static assets.
Setting up CloudFront for S3
First, we need to create an OriginAccessIdentity so that CloudFront can access our S3 bucket and makre sure we grant the S3 bucket read access for this origin. Here’s how we do it:
import * as cloudfront from 'aws-cdk-lib/aws-cloudfront';

const s3Origin = new cloudfront.OriginAccessIdentity(stack, 's3Origin', {
  comment: 'origin access for static assets only accessible via Cloudfront',
});

assetsBucket.grantRead(s3Origin);
Let’s add a behaviour for this origin to the CloudFront construct we created above:
const staticDistribution = new cloudfront.Distribution(stack, 'cdn', {
  comment: 'Serve the Lambda app and static assets',
  httpVersion: cloudfront.HttpVersion.HTTP2,
  defaultBehavior: {
    // the lambda behaviour
  },
  additionalBehaviors: {
    '/static/*': {
      origin: new S3Origin(assetsBucket, {
        originAccessIdentity: s3Origin,
        originId: 'staticAssets',
      }),
      cachePolicy: new cloudfront.CachePolicy(stack, 'cacheStaticAssets', {
        minTtl: Duration.days(30),
        maxTtl: Duration.days(60),
        defaultTtl: Duration.days(30),
      }),
      compress: true,
    },
  },
});
We add a new property in the additionalBehaviors object with the path we want this behaviour to fire on. We are using /static/* here so that all files with the url /static are served via S3.
We pass in the S3 bucket and the originAccessIdentity in the origin field and add a cache policy as our assets are not going to change that much and it makes it efficient. Also we enable compression to make sure we’re transferring leser bytes over the network.
We’re done with all our constructs! Let’s now import our stack and call it from the SST entrypoint which sst.config.ts. SST will use this to deploy our stack with the parameters we specify here.
import { type SSTConfig } from 'sst';
import { SsrStack } from './src/SsrStack';

export default {
  config(_input) {
    return { name: 'todomvcHtmx', region: 'eu-west-1' };
  },
  stacks(app) {
    app.stack(SsrStack);
    app.setDefaultRemovalPolicy('destroy');

    app.setDefaultFunctionProps({
      memorySize: '256 MB',
      timeout: '10 seconds',
    });
  },
} satisfies SSTConfig;
We export an object here in which we specify the name of our stack and the region to deploy it to. I’m using eu-west-1 (Ireland) but you can use any region of your choice.
We thn pass in our Stack in which all our constructs (Lambda, S3, CloudFront) are defined in the app.stack method. This tells SST to deploy our stack. We also set a removalPolicy so that everything is destroyed when we delete the stack and set a default memory size and timeout for our Lambda. This was it in terms of the configuration and we’re all set to deploy 🎉
Deploying the stack
Let’s deploy the stack and check if we can see our HTMX todo app in the browser 😃. There is a command deploy in package.json which is an alias for sst deploy. We will run it like this:
pnpm run deploy --stage dev
We pass in stage here because SST requires a value and we’re in development so I used dev. You can use anything you like here, even your name. Now SST starts deploying the resources to our AWS account and region we specified in sst.config.ts. If you get any issues here, check if you’ve followed the prerequisites correctly.
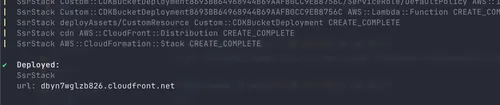
You’ll see something like this in your terminal as SST deploys the app:
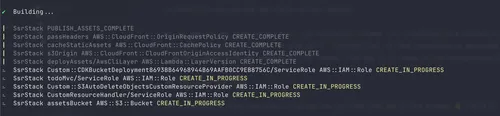
You can also see the same in the AWS console under CloudFormation:
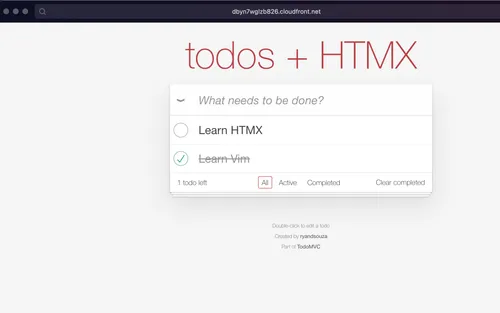
After deploying, you should see the CloudFormation URL as an output in the stack:
Clicking on this URL will take us to our Todo App and everything works as expected 😎
Conclusion
We deployed a full working HTMX + Express application to AWS 🎉. You will notice that the todos are not persistent because they are still in-memory. In the next post, we will see how to connect this with a database like DynamoDB. Here’s the repo again for those who want to experiment: https://github.com/ryands17/htmx-todomvc.
Note: To destroy the stack so that you don’t incur any costs, run pnpm destroy.
I hope you liked the post, follow me on Twitter: @ryands17 for where I will continue posting about this series. The next part will include a persistent database like SQLite or DynamoDB so that the todos aren’t lost on server restart. Happy learning 😃