- Published on
Validating forms with HTMX and Zod
4 min read
- Authors
-
-

- Name
- Ryan Dsouza
- @ryands1701/
- Senior Software Engineer at Shell Recharge Solutions
-
Introduction
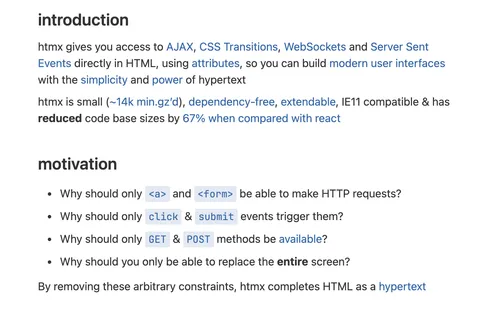
HTMX is amazing! Working with it is a breeze but it does take a while getting used to it because if you’re coming from React land! In this post, we’ll see how to use HTMX and Zod to validate a simple Login form and send the correct errors back to the client. If you haven’t seen my previous post yet, here is is: TodoMVC with HTMX and Hyperscript - Part 1.
Here’s the repo if you want to experiment and follow along: HTMX Forms. You can think of HTMX as a server rendered app (SSR) where you send just HTML back to the browser and HTMX handles that using it’s API. It can be best described as shown on the HTMX page:
What we’ll do here is create a registration form with two fields, email and password. Let’s create the base HTML that will be served by the main / endpoint:
function BaseHtml({ children }: html.PropsWithChildren) {
  return `<!DOCTYPE html>
  <html lang="en">
  <head>
    <meta charset="UTF-8">
    <meta name="viewport" content="width=device-width, initial-scale=1.0">
    <title>HTMX forms</title>
    <link rel="stylesheet" href="/static/index.css" />
    <script src="/static/[email protected]"></script>
    <script src="/static/[email protected]"></script>
  </head>
  ${children}
  <script>
    htmx.config.globalViewTransitions = true;
    htmx.config.useTemplateFragments = true;
  </script>
  </html>
`;
}
The above snippet uses the library @kitajs/html where we can write JSX so our components use props and are type-safe. We include the HTMX and Hyperscript scripts and some HTMX configuration in a script. We have the children prop and this is what we’ll pass as children to this component:
app.get('/', (_req, res) => {
  res.send(
    <BaseHtml>
      <body>
        <div class="h-screen flex flex-col items-center justify-center">
          <h2 class="text-3xl">Awesome app!</h2>
          <div class="card card-compact w-96 bg-base-100 shadow-xl">
            <div class="card-body">
              <RegistrationForm />
            </div>
          </div>
          <div id="registration-success" class="h-20">
            <div
              role="alert"
              class="alert alert-success w-auto mt-2 invisible"
            />
          </div>
        </div>
      </body>
    </BaseHtml>,
  );
});
We pass in the body with some Tailwind styles. Here the DaisyUI library is being used so that we can easily create components without writing a lot of Tailwind classes. We want a card like structure in which we want to display a form with email and password fields. As we’re using JSX and components, we create a <RegistrationForm /> component that will render the form.
import { clsx } from 'clsx';
type Errors = Record<string, { message: string }>;
type RegistrationFormProps = {
username?: string;
password?: string;
errors?: Errors;
};
function RegistrationForm(props: ResistrationFormProps) {
return (
<div>
<h2 class="card-title">Register</h2>
<form hx-post="/register" hx-target="closest div" hx-swap="outerHTML">
<div class="form-control w-full max-w-xs">
<label class="label" for="email">
<span class="label-text">What is your email?</span>
</label>
<input
type="email"
placeholder="enter your email"
id="email"
name="email"
value={props.email}
class={clsx('input input-bordered w-full max-w-xs', {
'input-error': props.errors?.email,
})}
required
/>
<p safe class="m-2 text-error h-4">
{props.errors?.email && props.errors.email.message}
</p>
</div>
<div class="form-control w-full max-w-xs">
<label class="label" for="password">
<span class="label-text">What is your password?</span>
</label>
<input
type="password"
placeholder="enter your password"
id="password"
name="password"
value={props.password}
class={clsx('input input-bordered w-full max-w-xs', {
'input-error': props.errors?.password,
})}
required
/>
<p safe class="m-2 text-error h-4">
{props.errors?.password && props.errors.password.message}
</p>
</div>
<div class="mt-2 flex">
<button class="btn btn-primary" type="submit">
Register
</button>
</div>
</form>
</div>
);
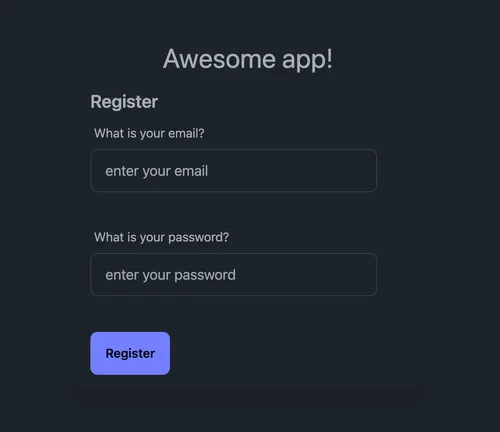
}We have a form here with two input fields. These input fields also contain errors displayed below that will be returned by the login API if we enter invalid credentials. These errors are given to us by Zod in the /register endpoint which checks if the email is a valid email and the password is at least 8 characters. This is how it looks like if we run our app and open http://localhost:3000:
Submitting the form
Let’s add some HTMX attributes on the form that will send a POST request to the /register endpoint. This will send the email and password fields in the body.
<div>
  <h2 class="card-title">Register</h2>
  <form hx-post="/register" hx-target="closest div" hx-swap="outerHTML">
    ...rest of the form fields and submit button
  </form>
</div>
Here’s what these HTMX attributes do:
hx-post: Send a POST request to the/registerendpoint. We will be adding this belowhx-target: Target the closestdiv, which is the one the encapsulates the formhx-swap: outerHTML is used to replace the entiredivwith the response from the/registerendpoint
The /register endpoint
Let’s move on to writing this endpoint the form submits, but before that, let’s create the Zod schema for the body of the /register request:
import { z } from 'zod';

const RegisterBodySchema = z.object({
  email: z.string().email('Please enter a valid email'),
  password: z.string().min(8, 'Password should be a minimum of 8 characters'),
});
The above schema makes sure that the email field is a valid email and the password is at least 8 characters. We also add custom error messages if they are not. Now we can write the /register endpoint that uses the above schema and returns HTML (or in our case JSX). We need to check for two conditions:
- If the email and password are valid, show a success alert on the page instead of the form
- If either the email or password are invalid, show the correct error messages below the input fields
The happy path
Starting with the first point, if the form values are valid, we show a success alert instead of the form like this:
app.post('/register', (req, res) => {
const result = RegisterBodySchema.safeParse(req.body);
if (result.success) {
res.send(
<div role="alert" class="alert alert-success w-auto mt-2">
<svg
xmlns="http://www.w3.org/2000/svg"
class="stroke-current shrink-0 h-6 w-6"
fill="none"
viewBox="0 0 24 24"
>
<path
stroke-linecap="round"
stroke-linejoin="round"
stroke-width="2"
d="M9 12l2 2 4-4m6 2a9 9 0 11-18 0 9 9 0 0118 0z"
/>
</svg>
<span>Registration Successful!</span>
</div>,
);
}
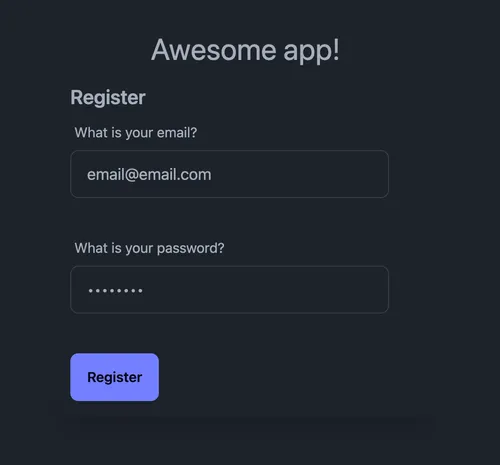
});We first parse the schema using Zod. We use safeParse here because we don’t want Zod to throw if the schema is invalid and make sure we capture the errors. Zod gives us a union type based on the success boolean field. We check if the success field is true and if it is, we send the success alert saying Registration Successful!. Here’s how it would look like:
The path of errors
That was the happy path. Now, let’s check if the result.success field is false in the else block. What we will do here is parse error messages returned by Zod and return the same <RegistrationForm /> component with the error messages below the inputs Zod gave us an error for.
app.post('/register', (req, res) => {
  const result = RegisterBodySchema.safeParse(req.body);
  if (result.success) {
    // the happy path
  } else {
    const errors: Errors = {};
    for (let error of result.error.errors) {
      errors[error.path[0]] = { message: error.message };
    }

    res.send(
      <RegistrationForm
        email={req.body.email}
        password={req.body.password}
        errors={errors}
      />,
    );
  }
});
In the above snippet, we map over the Zod errors and create an error object to pass in the errors prop to the <RegistrationForm /> component. This is then checked and renderd in the following way:
<div>
<h2 class="card-title">Register</h2>
<form hx-post="/register" hx-target="closest div" hx-swap="outerHTML">
<div class="form-control w-full max-w-xs">
...email label and input
<p safe class="m-2 text-error h-4">
{props.errors?.email && props.errors.email.message}
</p>
</div>
<div class="form-control w-full max-w-xs">
...password label and input
<p safe class="m-2 text-error h-4">
{props.errors?.password && props.errors.password.message}
</p>
</div>
<div class="mt-2 flex">
<button class="btn btn-primary" type="submit">
Register
</button>
</div>
</form>
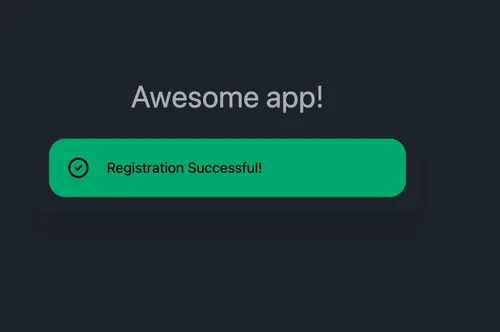
</div>We show the errors in the <p /> tag and display them if they exist in the Zod errors object. On submitting a password with only 4 characters, our API will return the error for the password field and will look something like this:
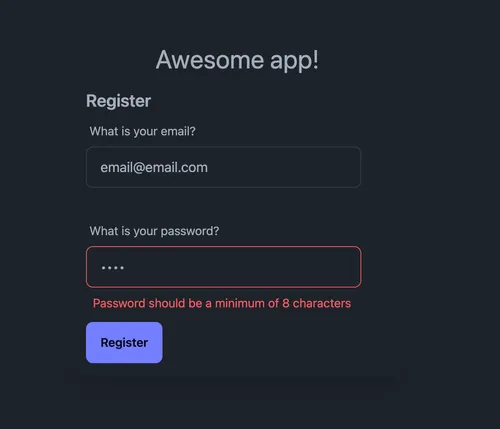
We can see the error set below password field and it’s the same we set in the registration Zod schema. We also added some height to the <p /> tag so that there’s no content layout shift when the error is shown.
Conclusion
This is how we can perform form validation with HTMX and Zod. I will come up with more examples in the future with complex forms and error handling, but the concept is the same. Hope you liked the post and here’s the repo again if you want to play around with it: HTMX forms. Thanks for reading and follow me on Twitter: @ryands17.